Integrating a Vintage Frame with Ornament SVG PNG into Professional Design Workflows
In the landscape of digital design and print production, assets are rarely static elements; they are functional components that must integrate seamlessly into broader creative processes. A Vintage Frame with Ornament SVG PNG represents more than just a decorative border. It is a versatile structural element that defines space, directs visual attention, and establishes tonal consistency. For professionals ranging from graphic designers to small business owners, understanding how to deploy this asset effectively requires a shift in perspective from simple decoration to strategic implementation.
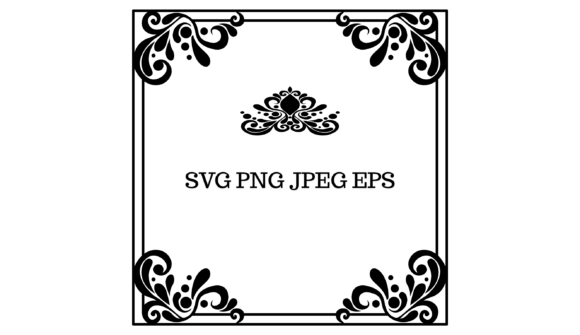
The specific composition described—a refined vintage-style frame with decorative corners and a beautiful central flourish—offers a complete vignette solution. This means it does not merely outline content but encapsulates it, creating a self-contained visual unit. When delivered in multiple formats, including transparent background PNGs, high-resolution JPEGs, and scalable vector files like SVG and EPS, the asset becomes adaptable to various stages of a project lifecycle. This article explores how to integrate such a frame into your workflow, ensuring efficiency, quality control, and aesthetic coherence across digital and print media.
Strategic Placement in the Design Lifecycle
Effective use of design assets begins with planning. Before opening any software, consider where the vintage frame fits within your project hierarchy. Is it the primary container for text, such as in a wedding invitation or certificate? Or is it a secondary element used to highlight a logo or product image on packaging? Answering this question early determines which file format you should prioritize and how you will structure your layers.
During the initial concept phase, the frame serves as a boundary condition. It dictates the usable area for typography and imagery. By placing the frame early in your layout process, you establish margins and padding requirements automatically. This prevents the common issue of overcrowding, where text bleeds too close to edges or decorative elements clash with core content. The central ornament, in particular, acts as an anchor point. It suggests a natural focal area, guiding the viewer’s eye to the most critical information, whether that is a couple’s names, a diploma title, or a brand logo.
Selecting the Right Format for Technical Compatibility
The utility of a Vintage Frame with Ornament SVG PNG lies heavily in its multi-format delivery. Each file type serves a distinct purpose in the production pipeline. Choosing the wrong format can lead to pixelation, editing difficulties, or compatibility errors. Understanding the technical strengths of each ensures smooth execution.
- SVG (Scalable Vector Graphics): Ideal for web design, social media graphics, and digital branding. SVGs remain crisp at any resolution, making them perfect for responsive layouts where the frame might need to scale up or down based on screen size. They are also lightweight, improving page load times for online portfolios or e-commerce sites.
- EPS (Encapsulated PostScript): The standard for professional print workflows. If you are sending files to a commercial printer for certificates, diplomas, or high-end packaging, EPS is essential. It allows for infinite scaling without quality loss and is fully editable in Adobe Illustrator. You can adjust stroke weights, change colors to match specific Pantone codes, or modify the corner details to suit custom requirements.
- PNG (Portable Network Graphics): Best for quick compositing and digital use where transparency is required. The 400 dpi resolution mentioned ensures that even if the PNG is used for high-quality prints like menus or invitations, it retains sufficient detail. The transparent background allows you to drop the frame over any texture, photo, or color block without manual masking.
- JPEG (Joint Photographic Experts Group): Suitable for previews, mockups, or situations where vector editing is not needed. While it lacks transparency, the high-resolution 400 dpi JPEG provides a reliable reference image for client approvals or quick social media posts where vector support might be limited.
By organizing these files in your project folder before starting, you streamline the transition from digital proofing to final output. This preparation minimizes last-minute conversions and reduces the risk of using a low-resolution raster image for a large-format print job.
Workflow Integration and Editing Techniques
Once the appropriate format is selected, the next step is integration. For users working in Adobe Illustrator or similar vector-based platforms, importing the EPS or SVG file allows for deep customization. You might find that the default black line weight does not match your brand guidelines. Because the file is vector-based, you can easily adjust the stroke thickness to create a more delicate or bold appearance. This level of control is crucial for maintaining brand consistency across different materials.
For those using raster-based tools like Photoshop or Canva, the PNG file offers immediate usability. Drag and drop the frame onto your canvas. Since it comes with a transparent background, it layers cleanly over existing designs. However, practical implementation requires attention to resolution. Ensure that your document settings match the 400 dpi quality of the PNG if you intend to print. If you are designing for web only, you may resize the image, but always maintain the aspect ratio to prevent distortion of the ornate corners and central flourish.
A common workflow challenge is text legibility within ornate frames. The decorative corners and central ornament add visual weight. To counterbalance this, keep the interior content clean and uncluttered. Use ample white space between the frame’s inner edge and your text. If the frame includes intricate details, avoid placing small, sans-serif fonts directly against the border, as they may get lost in the visual noise. Instead, opt for classic serif typefaces that complement the vintage aesthetic, or increase line spacing to improve readability.
Application Across Industries and Use Cases
The versatility of this asset allows it to serve diverse industries. Here is how different professionals can leverage the Vintage Frame with Ornament SVG PNG in their specific contexts:
Wedding and Event Planning
For wedding invitations, the frame provides an instant sense of elegance and tradition. Designers can place the couple’s names in the center, utilizing the flourish as a visual break between names and dates. The same frame can be repurposed for table numbers, menu cards, and thank-you notes, creating a cohesive stationery suite. Using the SVG format for digital save-the-dates ensures the design looks sharp on mobile devices.
Certification and Education
Educational institutions and corporate training programs often require certificates and diplomas. The formal structure of the vintage frame lends authority and prestige to these documents. When using the EPS file, printers can add foil stamping or embossing effects to the frame’s lines, enhancing the tactile quality of the final product. The central ornament can align perfectly with a seal or logo, reinforcing the document’s authenticity.
Retail and Packaging
Small business owners selling artisanal products can use the frame on packaging labels. It distinguishes premium items from standard offerings. By editing the vector file, businesses can incorporate their brand colors into the frame’s design, ensuring that the packaging aligns with their overall visual identity. The frame can also be used on social media posts to highlight customer testimonials or product features, adding a touch of sophistication to digital marketing efforts.
Quality Control and Long-Term Asset Management
To maximize the value of this asset, treat it as part of your long-term design library. Store the original SVG and EPS files in a dedicated "Master Assets" folder, separate from project-specific directories. This ensures that you always have access to the editable, high-quality source files for future projects. Rename files descriptively, such as "Vintage_Frame_Ornament_Master.eps," to facilitate quick retrieval.
Before finalizing any project, perform a quality check. Zoom in to 100% or higher to inspect the edges of the frame. In raster formats, look for jagged pixels or aliasing. In vector formats, ensure that all paths are closed and that there are no stray anchor points. If you have modified the colors, verify them against your brand’s style guide or the printer’s color specifications. Consistency in application builds trust with your audience, whether they are wedding guests, students, or customers.
Ultimately, the Vintage Frame with Ornament SVG PNG is a tool that bridges the gap between aesthetic desire and practical execution. By understanding its technical properties and integrating it thoughtfully into your workflow, you elevate the professionalism of your output. It is not just about adding a border; it is about structuring information, enhancing brand perception, and delivering a polished final product efficiently.